


Madi’s Kitchen is a delightful page of all of Madi’s recipes, updated with the newest recipe each week.
Madi will provide a recipe that she has developed that has been tested on her friends and family. Read more about Madi, and other contributors to The Ratonian on the About Us page.
Madi’s Recipes
- Pecan Shortbread
- Spring Asparagus Pasta
- Strawberry Rhubarb Crepes
- Homemade Marshmallow Peep
- Hot Cross Buns
- Corned Beef and Cabbage
- Mashed Potato Leftover Waffles
- Basic Egg Bread
- Nana’s Favorite Chocolate Chip Cookies
- Sourdough
- February 11, 2024 Valentine’s Day special German Chocolate Cake
- February 4, 2024 Pumpkin Ravioli
Posted April 23, 2024 – Pecan Shortbread
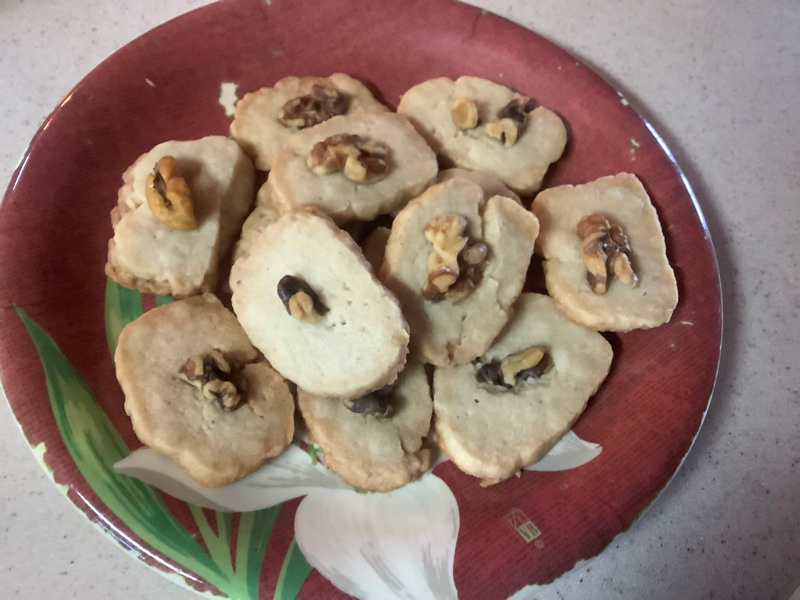
I love rainy afternoons; that’s the perfect time to read a good book and cuddle under a blanket. On a not-quite-warm-yet spring afternoon, a sweet treat hits just right. The toasty New Mexican pecans make this shortbread a solid choice for hot chocolate dunking, but it also goes well with a warm mug of tea!
Did you know, pecans are one of the few native grown nuts we can buy commercially today in the United States, and the only native nut we can grow here in New Mexico? While Georgia is the top producer of pecans in the US–which is kind of funny since pecans aren’t native to Georgia–New Mexico is a very respectable second place when it comes to pecan producing states. Most pecans in New Mexico are grown in the southeast part of the state, and every single pecan produced has the potential to grow into a tree over 100 feet tall that can live for centuries! That’s because each one is also a seed. As a seed, every nut also has different genetics, so there are tons of different varieties of pecans. Some have thicker shells, and some have thinner shells. Some need less water or grow faster in the heat. They all taste different too!
So, when you try to make this shortbread, maybe try a few different varieties of pecans out–you never know which one you will like best! Shortbread is a great basic biscuit; since it doesn’t have many strong flavors, its buttery texture is the star taste! This makes it great for adding toppings, like pecans or a drizzle of chocolate. They’re easy–the hardest part is waiting for the log to cool so you can get on to the baking part! You can also substitute coconut oil for the butter, in a one-to-one ratio, to make this recipe a vegan hit!
Pecan Shortbread Cookies
- 3/4 cup pecans coarsely chopped, toasted
- 10 tbsp unsalted butter at room temperature
- 1/2 cup confectioners’ (powdered) sugar
- 3/4 teaspoon kosher salt
- 1 1/2 cups all-purpose flour
- 1/2 teaspoon cinnamon
- 1/4 teaspoon allspice
- 1/4 teaspoon nutmeg
- 1/4 teaspoon cloves
- 2 tablespoons water or enough to make dough combine
- Toast chopped pecans on a baking sheet until browned.
In a stand mixer fitted with a paddle attachment, beat butter and confectioners’ sugar, vanilla and salt at medium until fluffy.
Whisk spices and flour together in a bowl.
Add flour mixture in and beat on low until almost combined then scrape the bowl down and mix in the toasted pecans. If the dough is crumbling, add water, starting with a tablespoon at a time. Usually two is about correct, but it may be more or less depending on a lot of factors!
- Roll dough into a log then wrap in parchment paper.
- Refrigerate for at least 1 hour. Add parchment paper to baking sheets.
- Preheat to 350F. Cut log into ½ inch thick rounds.
- Transfer to baking sheet. Space with 1 inch between.
- Bake for 10 minutes. Rotate baking sheets in the oven. Bake for another 10 minutes or until golden brown.
- Move to a wire sheet to cool.

Posted April 14, 2024 – Spring Asparagus Pasta

Spring can be a difficult season-but after the long cold, the first spring plants are very welcome! Even when there’s still snow in the ground, the first “spring” garlics and onions planted in the fall are coming up long, thin, and tender, but delicious! Asparagus is another vegetable that comes early and spring and pairs well with lemon. Adding some local meat in the form of sausage really takes this spring recipe over the top!
Asparagus is old—really old! 5000-year-old asparagus was found in Egyptian tombs, and ancient poems tell us that the Greeks prized it as well, searching for it and harvesting it in swampy marsh areas. And it was so popular with the Romans that someone used the term faster than asparagus is cooked! That meant it was something happening really fast—because you have to watch out. Asparagus, being so new and tender, cooks almost instantly. This recipe isn’t quite THAT fast, but it is a good busy weekday choice, because cooking the pasta is really the longest step.
One small note: asparagus—the fruit where the seeds come from—is actually poisonous to humans! So if you are growing asparagus, make sure kids and dogs stay away from the bright, cheery looking berries it puts on when summer starts! But other than that one small downside, asparagus has been loved in Raton for a long time. Old coal camp histories mention the asparagus growing in Sugarite—since it’s such a long lasting perennial and comes back year after year without really anything special, it’s a great low maintenance vegetable even today!The older, non commercial varieties of asparagus can be really pretty—they come in different colors like green, purple and white (though, the white ones are otherwise colorful asparagus that has been covered from the sun, so it hasn’t formed any coloring compounds!) White asparagus is also sweeter and thicker than green—if you’re feeling fancy, the white and green varieties would make for a beautiful dish!
After a hard day, nothing is better than being able to go to the asparagus patch and make yourself some delicious pasta. Maybe enjoy it with a friend!
One Pan Spring Pasta
Ingredients
- 1 pound (16 oz) ground sausage
- 1/2 cup diced green onion
- 1 clove garlic, minced
- 3 cups uncooked pasta
- 3 cups chicken broth
- 3 cups 1-inch asparagus pieces
- 1/4 cup minced fresh or dried dill
- Pinch red pepper flakes (more to taste)
- 2 tablespoons fresh lemon juice (about 1/2 a lemon)
Directions
- Heat a large, deep skillet with a cover over medium- high heat. Add sausage and cook, breaking up sausage until browned and cooked through, about 8 minutes. Add garlic and green onion, and cook for 1 minute or until it smells good.
- Add uncooked pasta and chicken broth and turn heat to high. Stir, and cook covered, for about 10 minutes, stirring occasionally so pasta cooks evenly.
- When pasta has about 3 minutes cook time remaining, stir in asparagus.
- When pasta is cooked to your liking, add in Parmesan, dill, red pepper flakes, and lemon juice. Stir to combine and serve.


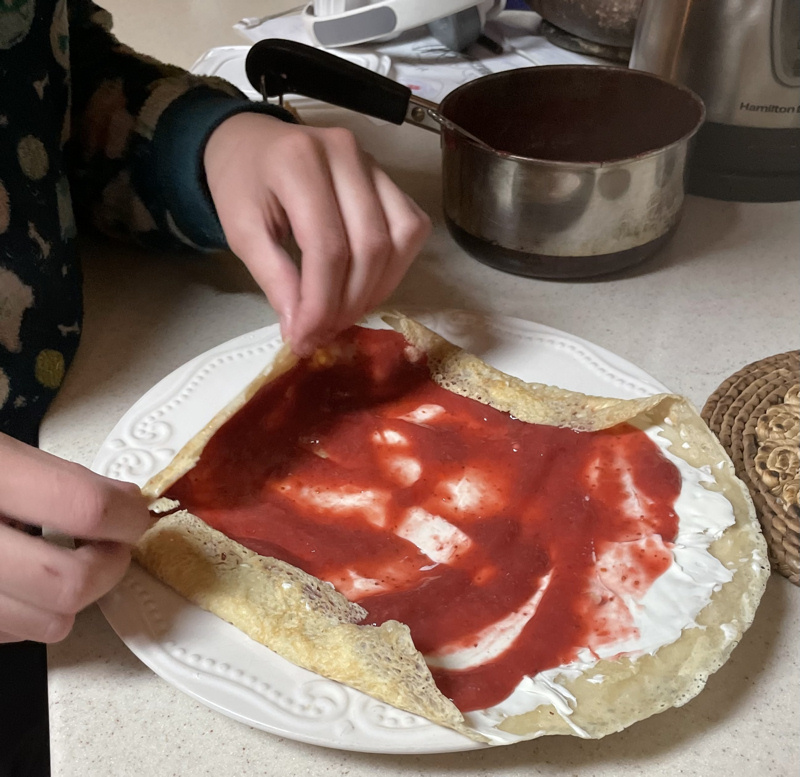
Posted April 7, 2024 – Strawberry Rhubarb Crepes
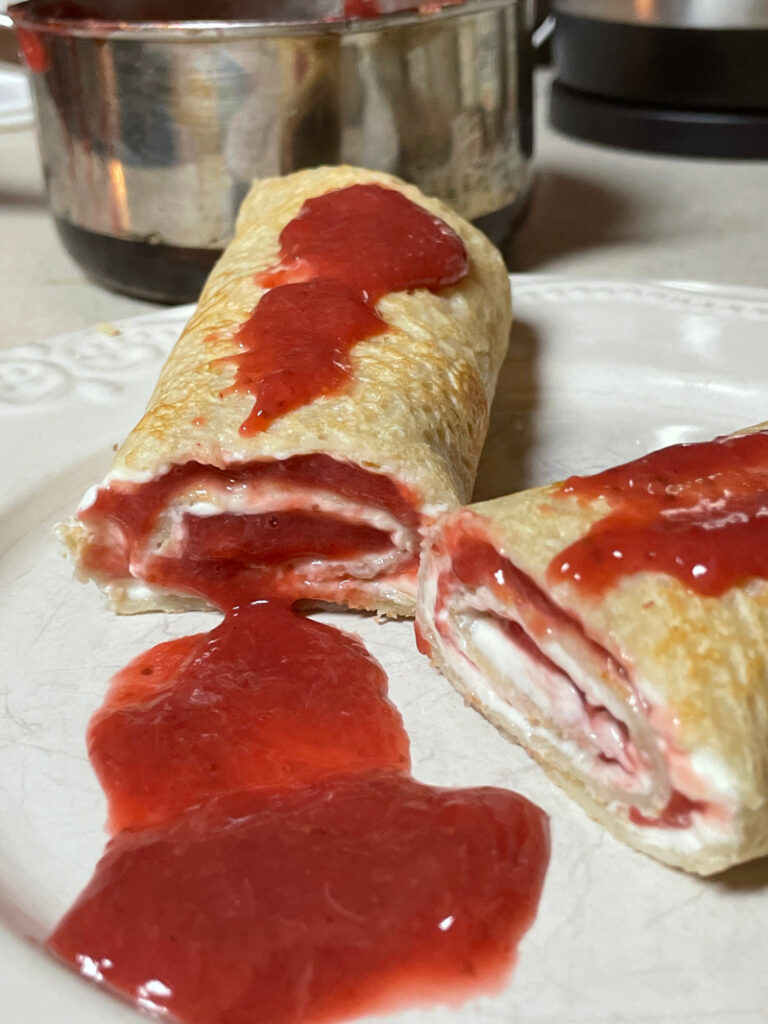
Rhubarb is one of the first fruits—really, a sweet vegetable—to come up in spring. It has been popular in our region for over one hundred years, brought by miners who liked its tart flavor and early appearance after a long winter. I’m not sure how the folks in the mining camp liked their rhubarb, but I think there is no better way to eat it than in crepes with cream cheese and strawberries!
Crepes sounds like a fancy treat but it really is not that fancy. They are made from very simple ingredients you probably have lying around your kitchen, and while a special crepe pan helps, you can make them easily in a regular frying pan. What actually makes this recipe special, in my opinion, is the filling!
We are lucky to be able to grow our own rhubarb here in Raton, but did you know, the Rhubarb Triangle, an area of Britain outside of South Yorkshire grows enough rhubarb to satisfy all of Britain, and used to grow enough rhubarb for the world! At their peak, they supplied 90% of the world’s commercial rhubarb, and every single stalk is picked by hand in candlelight! The rhubarb is grown for two years outdoors to create a strong root, and then moved into a dark shed to “force” the rhubarb up without any exposure to strong light. The plant turns the stored root energy into glucose, or sugar, making for an extra sweet-tart treat! But even regularly grown rhubarb doesn’t need any preparation to eat it, you can just eat it straight out of the ground. Just don’t eat the leaves! The leaves contain a lot of oxalic acid and can make you sick—only eat the crispy crimson red stems.
The other star component in the filling is strawberries, another early garden contender. Strawberries have been held in high regards since the 18th century but that wasn’t always the case. In pre-modern Europe, there were three different strawberries, but all were smaller and rounder than our modern berries. They were also significantly tougher and less less sweet than modern hybrids. In fact, strawberries remained mostly wild fruits until Virginia strawberries were brought back from North America and crossed with varieties from South America to create the garden strawberry. There are now many kinds available, and they can be preserved in many ways, including frozen, if you don’t have any fresh ones for the year yet!
Put together, these two spring favorites make for a delicious filling for your basic crepes! Try making some for someone you love, and impress them with this “fancy” dish!
Ingredients
Crepes:
- 3 TBS butter, melted; +3 TBS for pan
- 1 cup all-purpose flour
- 1 TBS granulated sugar
- 1/8 teaspoon salt
- 3/4 cup milk, room temperature
- 1/2 cup water
- 2 large eggs
- 1 1/2 TSP vanilla extract
Cream cheese filling :
- 1 1/2 cups farmers cheese
- 4 OZ cream cheese (1/2 cup)
- 1/4 cup sugar
- 1 TSP vanilla extract
- Fruit filling :
- 1 cup strawberries
- 1/2 cup rhubarb, chopped
- 1/2 cup sugar
- 1 teaspoon lemon juice plus more if needed
Instructions
For the crêpes
Melt 3 Tablespoons of butter in the microwave or on the stove. Cool for about 5 minutes before using in the next step. The remaining butter is for the skillet.
Combine the cooled melted butter, flour, sugar, salt, milk, water, eggs, and vanilla in,a large mixing bowl and whisk by hand. Mix until everything is combined. The mixture will be silky-smooth and the consistency of cream.
Cover the bowl tightly cover tightly, and chill in the refrigerator for 30–60 minutes and up to 1 day. (After refrigerating, if the batter looks separated, give it a quick stir before cooking)
Cook the crepes using the remaining butter for greasing the pan between each crepe and put a skillet over medium heat and generously grease it with some of the reserved butter.
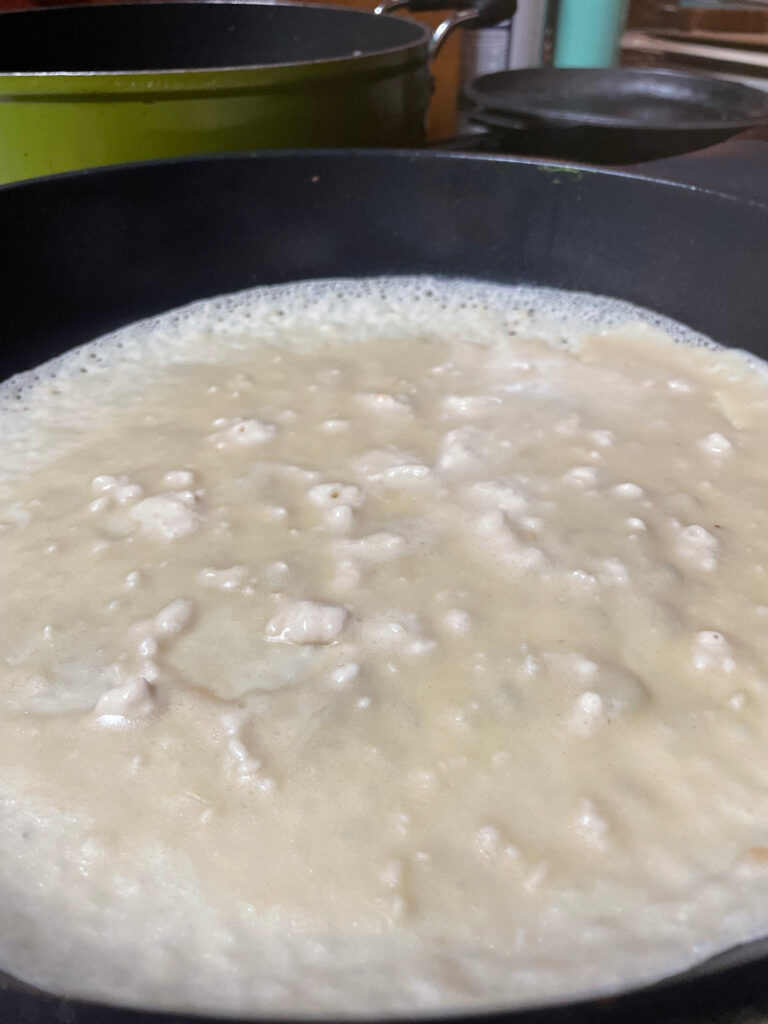
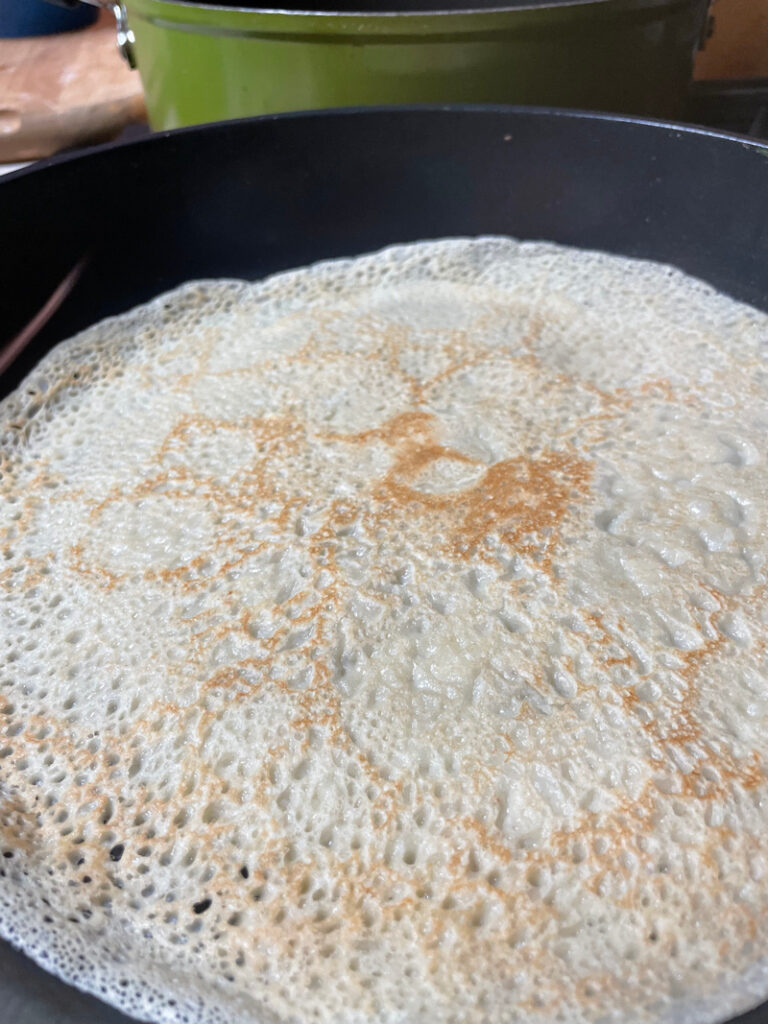
Once the skillet is hot, pour approximately 3TBS of batter into the center of the pan. Tilt/twirl the pan so the batter stretches as far as it will go. The thinner the crepe, the better the texture, but if there’s big lumps, that’s actually ok too!
Cook for 1–2 minutes, then flip as soon as the bottom is set. Don’t wait too long to flip crepes or else they will taste rubbery! Cook the other side for 30 seconds until set.
Transfer the cooked crepe to a large plate and repeat with the remaining batter, making sure to butter the pan between each crepe.
For cream cheese filling:
Mix cream cheese together in a bowl with sugar, vanilla, and lemon until everything is smoothly combined.
For strawberry rhubarb filling:
In a sauce pan, put the strawberries and rhubarb into the pan, covered with the sugar and put on low heat, giving a stir every once in a while
When berries break down, blend into smooth purée and return the pan. Add lemon juice; the lemon juice will help it thicken. Cook until desired thickness.
To fill the crepes:
After the crêpes are cooled, place a few spoonfuls of your cream cheese filling in the center of the crepe. Spread it around so there’s an even layer and then add the fruit filling.
Fold opposite sides slightly in, then turn crepe like you are going to roll a burrito. Roll it up!
Crepes are delicious with toppings, too, such as a drizzle of melted chocolate and powdered sugar, or any combination of fruits and nuts!

March 31, 2024 – Homemade Marshmallow Peep
Happy Easter!
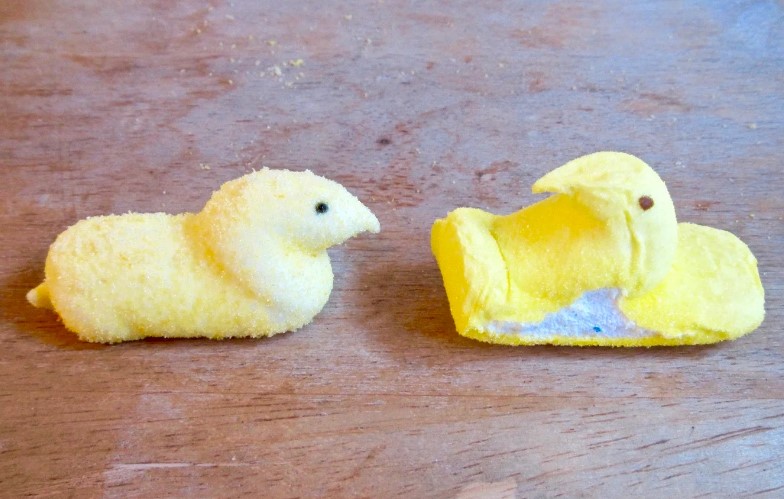
Today’s recipe is a classic Easter treat, along with chocolate eggs, chocolate bunnies, and jelly beans—Peeps™️! Or at least, a homemade version of the smooshy, yellow little marshmallow treats. The Peep may be well known, but less well known is how marshmallows began their culinary journey into an Easter staple.
Marshmallows were originally made from the root of the marshmallow plant, which like its name implies can be found growing in marshes. In fact, the ancient Egyptians who lived and farmed along the Nile were likely the first to squeeze sap from the mallow plant and mix it with nuts and honey, but no one really knows what the candy would have looked like in those times. The French were the first to introduce the modern fluffed marshmallow candy in the early 1800s. Owners of small confectioneries whipped sap from the mallow root and poured the sweet concoction into a candy mold. The mass produced marshmallow as we know today in the USA did not exist until years later, when a patented machine was made to extrude the marshmallow syrup. One thing hasn’t changed throughout 2000 years of marshmallow making is that you don’t want to burn your syrup—so patience is key!
That said, you can make marshmallows in a variety of ways. Some recipes call for egg whites to get the marshmallow to set up faster. Others call for them to be made without egg whites but with gelatin instead: those set slower, but are really good! This week’s recipe calls for gelatin, which is made from animal collagen, but if you want a vegan alternative, agar-agar is made from seaweed and sets just as well! It’s also likely a traditional ingredient from the ocean marshes, same as the mallow.
In fact, that seaside association long stuck with the marshmallow. Over 120 years ago, newspapers raved about “the latest thing in the way of summer resort diversions! The simplicity of this diversion is particularly charming, and the idea is sure to grow in favor.” It was referring to the the new-fangled idea of marshmallow roasting! They were talking about the young people at beach resorts, roasting marshmallows over the bonfire—not people camping out in the mountains! That may be what we think of as the way to eat them today—roasted over a campfire—but it wasn’t always that way, clearly!
However you like your marshmallows—shaped like a bird, whipped into fluff, roasted on a fire or maybe, mixed with nuts and honey Egyptian-style—enjoy a few this easter!
Marshmallow recipe
INGREDIENTS:
- Butter for greasing
- 3 envelopes of un-flavored gelatin (7 teaspoons)
- 1⁄2 cup of cold water
- 2 cups of granulated sugar
- 1 cup of light corn syrup
- 2 tsp of vanilla extract
- 1⁄8 tsp of salt
- 2⁄3 cup of confectioners’ sugar, plus more for dusting the pan
INSTRUCTIONS
1. Grease a 9×13 inch baking dish well with butter or if you’re going to pipe peeps, grab a cookie sheet and put a silicone mat or parchment paper down.
2. In the bowl of a stand mixer (or a large heat-proof bowl), mix the cold water and gelatin. Set aside while continuing the rest of the steps.
3. In a medium saucepan, add the sugar, corn syrup, and 1⁄2 cup of water. Stir gently to combine. Put the pan over medium-high heat and bring it to a boil. Keep cooking the mixture until it registers 235-240 ̊F on a candy thermometer or cooking thermometer.
4. When the sugar syrup reaches the right stage, remove it from the heat and let it cook slightly.
5. Turn the standmixer with the gelatin and water mixer on medium speed and slowly pour in the sugar syrup. Alternatively, you can use an electric hand-held mixer and have someone help you pour the syrup mixture in.
6. Once all the syrup has been added, mix on medium-high speed for 10-12 minutes, or until the mixture is white and it makes stiff peaks. Add the vanilla extract,and salt. Mix for 1 more minute to fully combine.
8. Pour the marshmallow mixture into the greased pan, and using a greased spatula or spoon, spread the marshmallow out evenly. Dust with powdered sugar and let set. Cut into marshmallow cubes when cooled (6 hours).
- For bird shaped marshmallows, put marshmallow paste into a piping bag. Pipe a body, and then a head, pulling the piping bag away from the face, sideways, to make a “beak”. There are good videos to follow online. You can roll even them in colored sugar to make them extra fancy!
March 24, 2024 – Hot Cross Buns

It’s officially spring—on the calendar!—and also Easter Season. This week’s Hot Cross Bun recipe, then, is perfect because it actually used to be illegal to sell hot cross buns on any day except Christmas and Good Friday. An exception was made for funerals, too.
Nowadays, there are many different types of hot cross buns—and you can get them or make them any day of the year. Fun variations on the standard bun can include hot cross chocolate chip buns, gluten-free buns, buns with icing in place of the traditional sugar dough, and even savory hot cross buns with bacon crosses! Today’s take uses New Mexican elderberries in place of the usual raisins or currants, but other than that consider it a jumping off point to try your own unique variations.
Historically, hot cross buns were hung from the kitchen rafters for a whole year, and replaced each Good Friday. The belief was that they would ward off evil spirits because of the cross on top, and sometimes were taken as a folk medicine as well. They were popular with the common people of the United Kingdom long before the hot cross bun song came along. But the song didn’t actually start as a rhyme 300 years ago. It was one of the earliest examples of a marketing jingle! It was used as a street cry to market buns, and the street sellers probably said something more along the lines of, “Hot cross buns, hot cross buns, one a-penny, two a-penny!” to advertise their pricing: one large bun or two small buns for a penny!
A cute but lesser known Irish rhyme says this about the buns: “Half for you and half for me, between us two, good luck shall be!” So share one of these with a friend, and ensure an extra lucky friendship in the coming year! Also, come back next week for an extra special Easter recipe—
Peep peep!
RECIPE:
Dough:
- 1 cup hot juice
- 3/4 cup dried fruit
- 1 package (0.25 oz) active dry yeast – (equiv. to 2 ¼ teaspoons)
- 3/4 cup warm milk
- 3 to 3 1/2 cups bread flour, plus more as needed
- 1 teaspoons Kosher salt
- 3/4 teaspoon ground cinnamon
- 1/4 teaspoon ground allspice
- 1/8 teaspoon ground nutmeg
- 1/2 cup granulated sugar, plus 1 teaspoon
- 6 tablespoons unsalted butter, melted and cooled (I use coconut oil)
- 2 large eggs, beaten
- 1 tablespoon orange zest
Flour paste for cross:
- 1/2 cup all-purpose flour
- 3 to 5 tablespoons water
- 1 tablespoon granulated sugar
Egg wash:
- 1 large egg
- 1 tablespoon heavy cream or whole milk
Sugar glaze:
- 1/2 cup granulated sugar
- 6 tablespoons water
- Egg wash: whisk 1 large egg and 1 tablespoon heavy cream or whole milk. Brush buns with egg wash after they have risen.
Instructions:
* Soak dried fruit in juice of your choice. Traditionally, that might be raisins or currants in apple cider, but I’m using elderberries and elderberry juice. Let sit for about 30 minutes. Then, drain and set aside. Pat dry.
*Set up the dough hook attachment of a stand mixer if you have one. In the bowl, add the warm milk (about 110-115 degrees F, or feeling warm to your hand) and active dry yeast, along with 1 teaspoon granulated sugar to wake up the yeast. Stir and let it stand for 10 minutes until foamy.
* In a large bowl, whisk the flour, salt, cinnamon, allspice, nutmeg, and sugar. Set aside.
*With the mixer on low speed, add half of the dry ingredients to the yeast mixture until just combined (keep using the dough hook if you have it). Then add melted butter, eggs, and the other half of the dry ingredients, and mix.
*Increase to medium speed and mix for about 5-6 minutes, adding more flour as necessary until it pulls away from the bowl and is slightly sticky but manageable.
*Add the raisins(or whatever dried fruit you choose) and orange zest, and mix until incorporated, about 30 seconds.
* Transfer to a floured surface and knead a few times until smooth, elastic, and slightly sticky.
*Form into a ball and place on a lightly oiled bowl (olive oil is fine), making sure to coat the dough with some of the oil. Cover with plastic wrap and let it rise in a warm and draft-free environment for about 1 hour, or until doubled in size.
* Punch down the dough and transfer to a floured clean surface. Knead a few times, and cut the dough into 12 equal pieces. Shape into balls, pinching at the bottom, and place on a lightly greased sheet pan or baking pan. Cover and let rise about 30 minutes in a warm and draft-free environment, until doubled in size.
* Preheat oven to 375 degrees F.
Flour paste for the cross: combine the 1/2 cup all-purpose flour, sugar, and water. Add the water, 1 tablespoon at a time, until you get a thick but pipeable paste. Fill a piping bag with the paste and pipe over the buns to form a cross on each bun.
* Bake at 375 degrees for 20 to 25 minutes, until golden brown and puffed. Remove buns from oven. Cool for 10 minutes.
* Meanwhile make the sugar glaze: in a small saucepan combine sugar and water. Bring to a boil and simmer about 10 minutes, until thickened.
* Brush hot cross buns with the sugar glaze when cool.
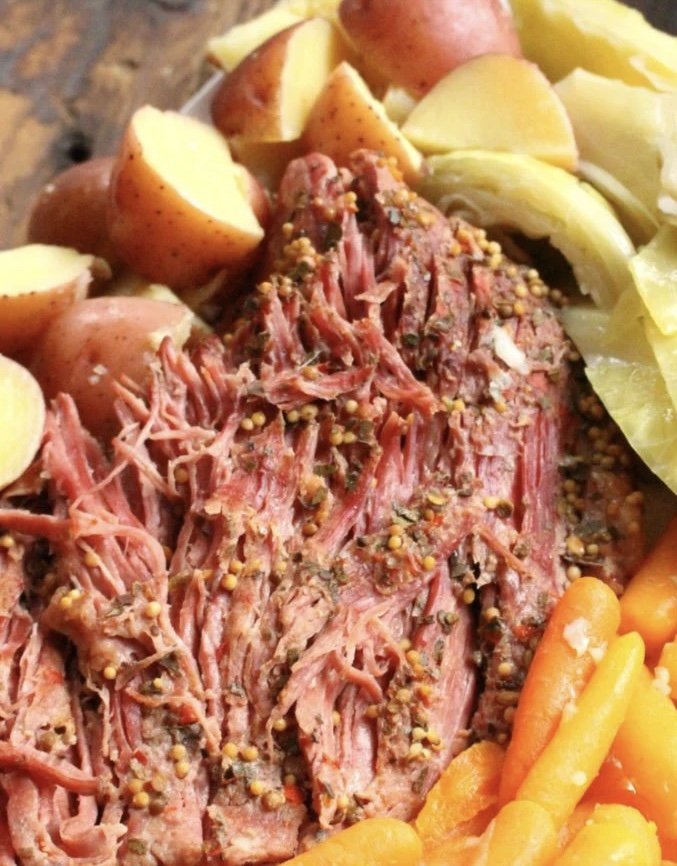
March 17, 2024 – Corned Beef and Cabbage
It’s St. Patrick’s Day, the day of leprechauns and silly green hats, pots of gold at the end of the rainbow, and best of all: corned beef and cabbage. Corned beef and cabbage the way we enjoy it today is associated with Ireland, but hasn’t been particularly popular there until recently!
Salted beef, however, was popular across Europe and the Middle East during the Middle Ages, especially in the British Isles. It wasn’t common further north in Ireland and Scotland though. There, cows were a symbol of wealth and a sacred animal. Because of their sacred association, they were only killed for their meat if the cows were too old to work or produce milk. So, beef was not even a part of the diet for the majority of the population. When they had beef, they usually salted it too so they would last longer. In fact, the corned part of corn beef and cabbage is referring to the size of the salt on the meat: “corns” refer to grains like rye or wheat in Britain, and not maize corn. Still, that’s pretty big salt!
But corned beef wasn’t produced at a large scale until the British Industrial Revolution and the Cattle Acts. The Cattle Acts stopped the export of live cattle to England, the biggest market for beef in English-controlled Ireland. That flooded the Irish market with more cattle than anticipated and lowered the cost of meat available for salted beef production. In turn, the Irish corned beef became a huge export to Britain, where it fed the British Navy and the British colonies—but not the Irish.
Most Irish first met corned beef in America, after 1845. When Phytophthora infestans, the potato blight, hit Ireland, it wiped out much of the potato fields, all planted with the iconic Irish Lumper potato. The susceptible plants—almost all of them, since they were only one variety!—turned to mush, and the Irish turned to America. Landing on the east coast, many of these new immigrants settled near other new immigrants from Eastern and Central Europe. The corned beef the Eastern European Jewish immigrants made was from brisket, a kosher cut of meat that is a much tougher cut. Brining it transforms the meat into the extremely tender, flavorful corned beef we know of today.
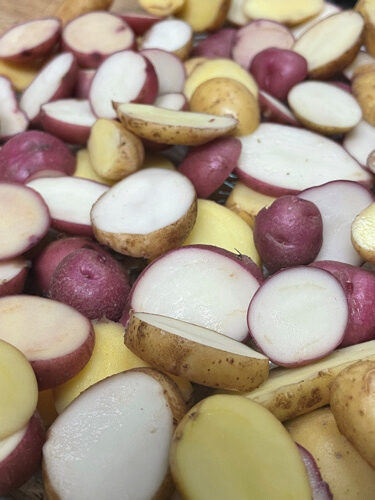
Most recipes call for late winter cabbage to be added in addition to root vegetables. Onion, carrot, and of course, the staple potato are all recommended. My family likes to add potatoes and carrots to corned beef and cabbage. We all think it needs the potatoes and carrots—both are deliciously sweet and earthy when added to the salty meat. I suggest you try potato varieties other than the Lumper, though!
I hope you enjoy this recipe—it makes the perfect leprechaun bait, and if it does happen to lead you to the pot of gold at the end of the rainbow, then your St. Paddy’s Day is doubly lucky! But even without all that, you’ll feel like a million bucks when you have this simple classic.
Corned Beef with Veggies
Ingredients:
- 10 baby potatoes, quartered
- 4 large carrots, cut into matchstick pieces
- 4 cups water
- 1 (4 pound) corned beef brisket
- 1 head cabbage, coarsely chopped
- 3 bay leaves
- 1/2 tbs coriander
- 1/2 tbs mustard seeds
- 2 tsp salt
- 1 tsp pepper
- 1/2 tsp juniper berries
Directions:
- Place potatoes and carrots into the bottom of a slow cooker; place brisket on top of vegetables. Pour water over brisket; sprinkle over spices and cover.
- Cook on High for 7 hours; stir in the cabbage and cook for 1 more hour.
- Serve with a pat of butter and enjoy!
March 10, 2024 – Mashed Potato Leftover Waffles
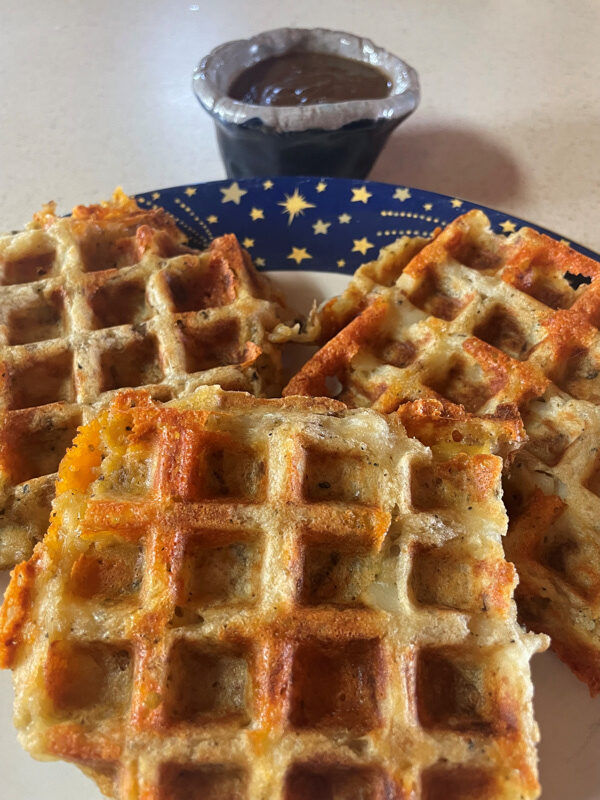
With daylight saving time here, it’s time for spring cleaning, so here’s a delicious recipe to tackle some of those leftovers in your fridge!
In fact, this week’s recipe is even an adaptation from a “leftover” library book—picked up at the AJM library books sale! Christina Tosi’s “Milk Bar: Kids Only” is a great book (you can also check out a copy from the library). Her leftover waffles can be made with just about any type of leftover—Spanish rice, extra cookie dough, mac and cheese, cut up hotdogs and waffle batter!—but my favorite is mashed potatoes. You heard that right—mashed potato waffles (with cheese).
In England and Ireland, these have been a junk-food-adjacent staple since 1981! The pioneering frozen foods company Bird’s Eye took a chance on a junior advertising agent’s suggestion and the potato waffle in a box was born. Quickly beloved, the boxed waffles are sold frozen, and may be baked, grilled, or fried. However they’re cooked, they stay nice and light and airy. They can be just a snack, or a side dish, or eaten as a breakfast with sausages or bacon.
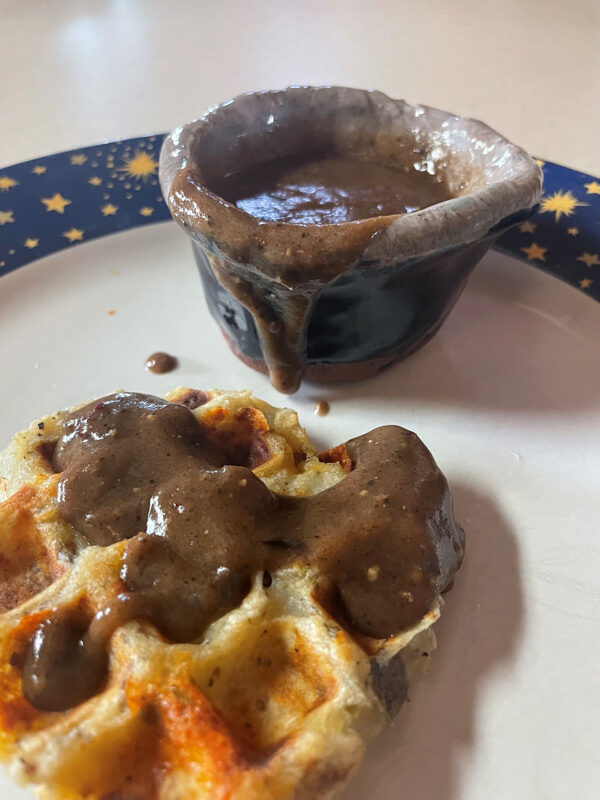
But best thing about potato waffles, especially the ones you make yourself, is there’s no rules for eating them. You can stuff them with cheddar or cream cheese, put in bacon bits, or a handful of green onion. And then there’s the toppings! You can use a huge range of toppings. If it goes with potatoes or waffles, it’ll work with this. I like to use sour cream on mine personally, but you could use anything from maple syrup to mushroom gravy.
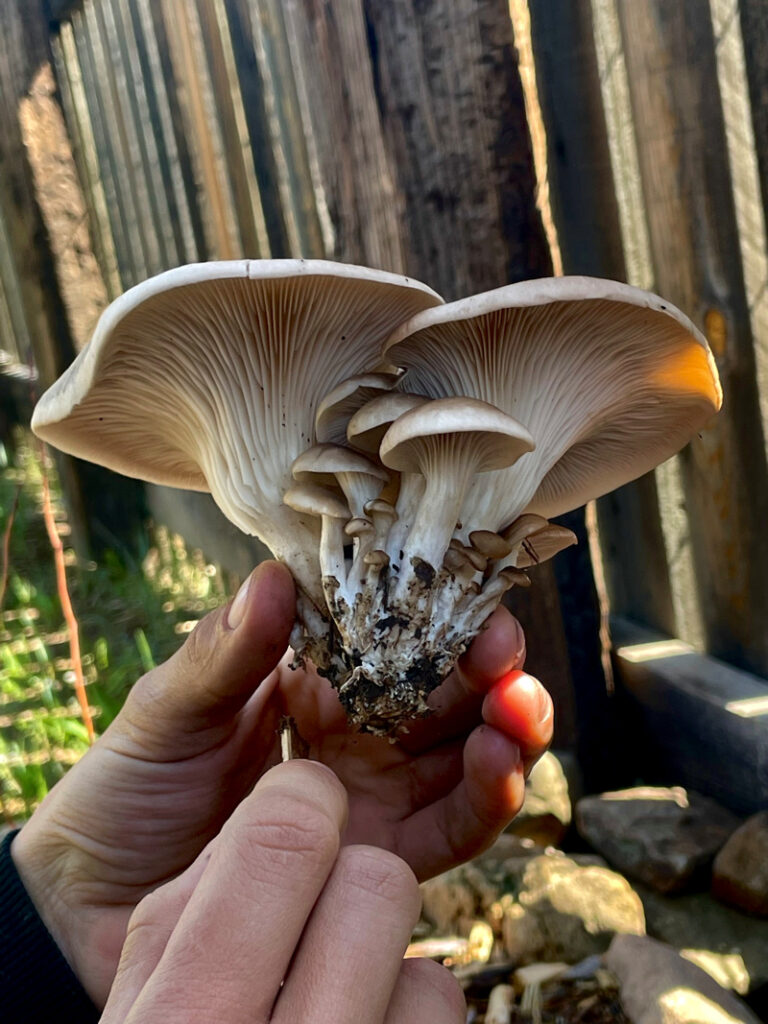
Speaking of mushrooms: yuck. I’m not a fan. Their texture, the flavor, all of it. However, my family really likes mushrooms, and gets very excited for mushrooming season. In the spring, when it’s warm and wet, you can forage for mushrooms outside in northern New Mexico and Colorado. You can also try all kinds of interesting mushrooms from the store. If you don’t have fresh mushrooms or aren’t a fan of their texture though, you can use dried mushroom powder, like I did for the bonus gravy recipe!
However you eat your potato waffles, I hope you enjoy them!
- Mashed potato leftover waffles
- 2 1/2 cups mashed potatoes
- 1/2 cup cheddar cheese (or whatever cheese you would prefer) cut into small squares
- 1/4 cup flour + more on reserve if needed
In a medium sized bowl, pour the mashed potatoes, cheese and flour. Start with the recommended amount of flour, keeping in mind you can always add more if it’s too watery. Once you have that mixed, it should feel kind of like Play-Doh.
- Preheat the waffle maker or stovetop waffle iron. When your waffle maker is preheated take some of the mashed potato dough and form it into a waffle sized pancake shape. Most waffle makers will fit 4 of them at a time.
- Cooked until the green light appears (on most new waffle makers) or until it is crispy and golden.
- Let them cool on the wire rack a bit and then enjoy.
This recipe makes about 8 standard waffles.
Mushroom Gravy
1/4 cup extra-virgin olive oil
1/4 cup onion, finely chopped
1/2 cup mushrooms, finely chopped
OR – Mushroom Gravy
1 1/2 tablespoon dry mushroom powder
1/4 cup all-purpose flour
2 cups stock (or water)
1/2 teaspoon soy sauce, more to taste
1/8 teaspoon black pepper
- In a large skillet, heat oil over medium-high heat. Add onion and mushrooms or mushroom powder; cook, stirring, until well browned, 8 to 10 minutes.
- Sprinkle in flour and cook, stirring, until golden brown, 3 to 5 minutes.
- Slowly whisk in vegetable stock, a little at a time, until a smooth sauce forms.
- Simmer 2 to 3 minutes until thickened and season with soy sauce, salt and peppers.
March 3, 2024 – Basic Egg Bread

Egg bread is one of my family’s favorite recipes! All it is really is an enriched bread—or a bread that’s higher in fat because of its egg, milk or butter content. In this case, the bread is filled with lots and lots of eggs. Enriched breads take longer to rise, but are a lot softer and more tender. Since they are so soft, braiding them helps them keep their shape. The recipe I’m using today makes two medium sized braided loaves, but usually, I make a double batch. Not only does it make four good sized loaves—enough to share with family and friends—but it also uses 18 eggs that way! Since we have chickens, that’s OK; we have excess eggs!
This is a basic recipe that is popular all over the northern hemisphere: used for brioche French toast in Korea and Japan, known for rolls on the islands of Hawaii (and on Thanksgiving dinner tables across the mainland USA!), braided up as challah for a Kosher treat or eaten as pasca in springtime in eastern Europe. It’s even found down in the boot of Italy, where they make a variation of this bread called Easter bread, or Pane de Pasqua. Their take on Easter bread is a soft, flaky brioche, like this egg bread, decorated with colored eggs and topped with colored sugar or sprinkles. The eggs can be dyed raw and set into the bread, where they’ll bake as the bread cooks (though, it’s best to poke a small hole in the eggs to keep them from exploding!)
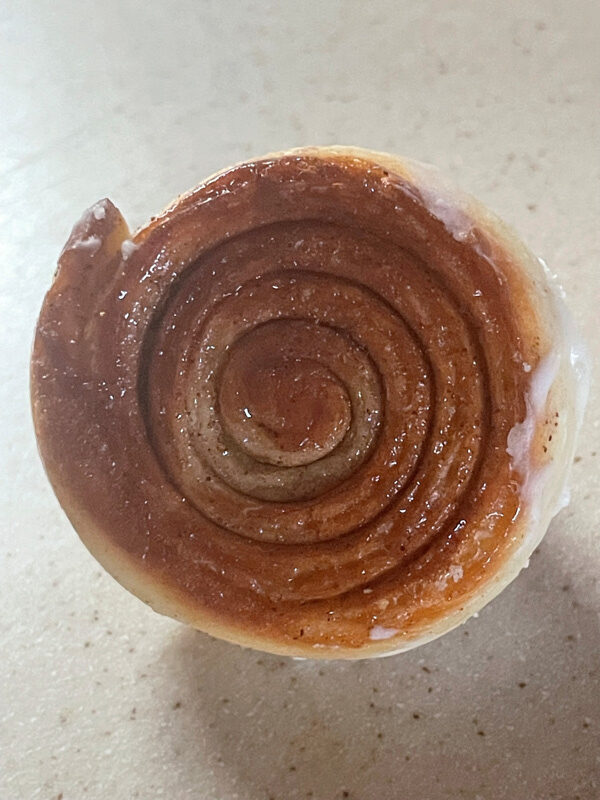
It’s kind of the perfect centerpiece for an Easter gathering, because then you can use the leftover Easter bread with eggs to make yourself an egg salad sandwich! Just slice yourself a few slices of bread and crack open the eggs from the bread to make a quick Easter Day dinner. But egg sandwiches aren’t all it’s good for; this bread is good for a lot of things. It’s great for French toast, if you want to use up the rest of your extra egg white from the recipe. If you want to get REALLY fancy, you can try stuffed French toast (ie a French toast sandwich stuffed with jam and cream cheese!) It is also good for grilled cheese sandwiches and will make an extra toasty golden brown lunch. You could also tear it up to make bread pudding, and add spices or dried fruit, or even citrus peels. any extra dough you have rolled up with cinnamon sugar makes good little cinnamon roll bites. Like I said, there are lots of options. Maybe you’ll even be called to make Easter bread sometime soon—whatever you do with this recipe, I’d love to see!

Ingredients:
- 4 1/2 teaspoons active dry yeast
- 2/3 cup warm water
- 6 large egg yolks
- 3 large eggs, at room temperature
- ½ cup vegetable oil
- ¼ cup white sugar
- 1 teaspoon salt
- 4 ½ cups all-purpose flour
- 1 pinch salt (did you know: a pinch, officially, is 1/8 tsp)
Directions:
Dissolve yeast in warm water in a large bowl and let stand until yeast softens and foams—about 5 minutes.
2. Stir in 6 egg yolks, 3 whole eggs, oil, sugar, and salt. Mix in 3 1/2 cups to 4 1/2 cups of flour to make a soft, sticky dough. Usually about 4 cups is right, but it could be a little more or less.
3. Turn dough out onto a lightly floured surface and knead until smooth and elastic, about 7 minutes.
4. Transfer dough to a well-oiled bowl and turn until entire surface is coated with oil. Cover with a damp cloth and let rise in a warm place until doubled in volume, about 1 1/2 hours. Punch down the dough and divide into thirds. Roll each piece into a 12-inch long rope. Braid the three strands together and seal the ends. Transfer the bread to a cookie sheet.
5. Whisk the egg whites with a pinch of salt; brush on top and sides of bread. Set eggwash aside. Let bread rise until doubled in volume, about 45 minutes.
6. Preheat the oven to 375 degrees F. Brush bread again with eggwash.
7. Bake in the preheated oven until golden, about 15-35 minutes (depending on the shape of bread; less for buns, longer for loaves).
8. Cool on a wire rack. Enjoy.
*A note, this recipe makes two medium sized loaves, or about 18 rolls.
February 25, 2024 – Nana’s Favorite Chocolate Chip Cookies
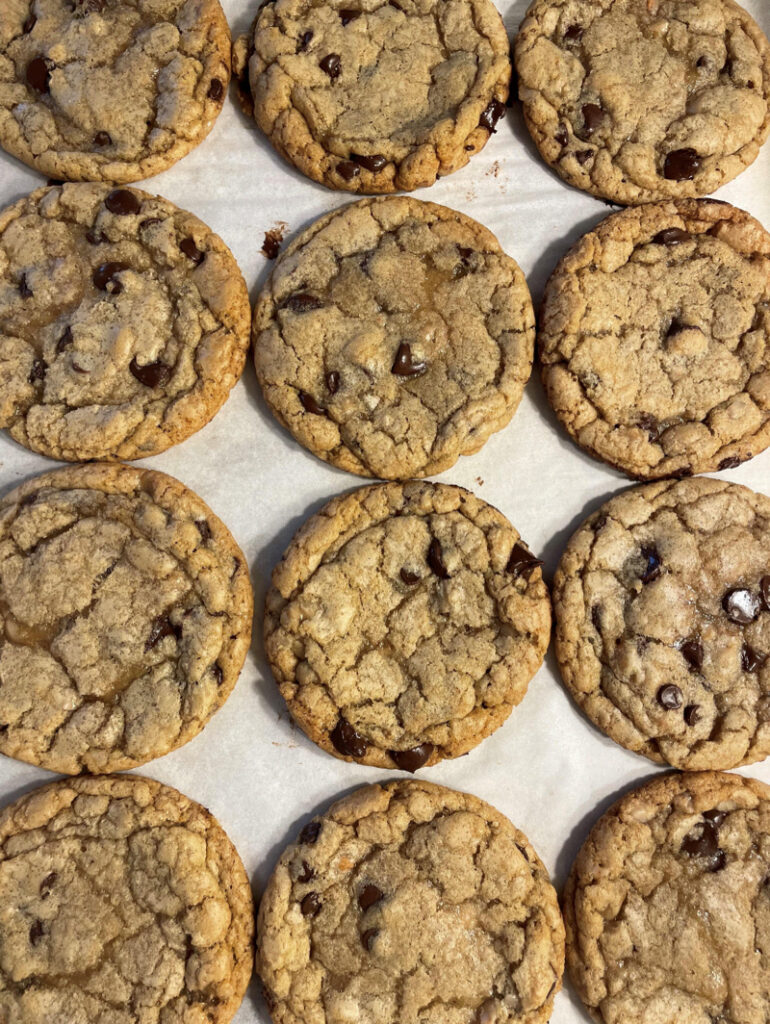
A warm cookie and a cold glass of milk is a great way to end the day, but baking those cookies yourself makes them even better! Homemade cookies rarely last long enough to get stale, unlike cookies that have been sitting on a store shelf for weeks. In fact, these cookies are so good, my nana calls to ask me for the recipe! If it’s nana approved, it has to be good! I think it’s mostly because the chocolate chips in these cookies stay melty for an unbelievably long time in a way that store-bought cookies can only envy.
Before the first chocolate chip cookies could ever hit the shelves, however, someone had to come up with the idea for chipped chocolate! The very first chocolate chip cookie recipe was invented by an inn owner named Ruth Wakefield, who ran the Tollhouse Inn. In 1937 she printed the recipe in the “Ruth Wakefield’s Tollhouse Tried and True Recipes Cookbook” where the cookies were billed as “Chocolate crunch cookies”—because chocolate didn’t come in chip form yet! Ruth Wakefield chopped up semi-sweet Nestlé candy bars to make her cookies. The cookies were a huge success, and Nestlé’s chocolate sales in New England, where the Tollhouse Inn was located, had bumped up by 500% by 1939. That’s a lot of chocolate!
That same year, Nestlé came knocking on Ruth’s door to get her official endorsement, and she soon reached an agreement with Nestlé to add her recipe to the chocolate bar’s packaging in exchange for a lifetime supply of chocolate—and a dollar. (She never got the dollar, but still a pretty good deal, I think!) She gave the company the right to use her recipe as well as the Tollhouse name.

But these chocolates were still in bar form, only they now came with a chopping tool and pre-indented score lines. It wasn’t until 1941 that Nestlé and at least one of its competitors started selling the chocolate in “chip” form, which they called morsels. WWII saw Nestlé and these new chocolate morsels campaigning to bring Tollhouse cookies to our boys fighting overseas—”Dear Mom!” one postcard recipe read, “The Boys will make you an honorary General if you’ll just send us more Tollhouse cookies!”
I can’t promise this recipe will help you become a general, but these chocolate chip cookies are perfect for any occasion. You could give them as a gift…or you could just bake them for yourself!
Ingredients
- 2 and 1/4 cups all-purpose flour
- 1 teaspoon baking soda
- 1/2 teaspoon salt
- 3/4 cup unsalted butter, melted & cooled
- 1/2 cup packed brown sugar
- 1/2 cup granulated sugar
- 1 large egg + 1 egg yolk, room temperature
- 2 teaspoons pure vanilla extract
- 3/4 cup semi-sweet chocolate chips or chocolate chunks, whatever brand you prefer
Instructions
- Whisk flour, baking soda, and salt together in a large bowl. Set aside.
- In a medium bowl, whisk the melted butter, brown sugar, and granulated sugar together until no brown sugar lumps remain. Whisk in the egg and egg yolk. Finally, whisk in the vanilla extract.
- **The mixture will be thin. That’s ok!
Instructions continued
- Pour the wet ingredients into dry ingredients and mix together with a large spoon or rubber spatula. The dough will be very soft, thick, and appear greasy and shiny.
- Fold in the chocolate chips. The chocolate chips may not stick to the dough because of the melted butter, but do your best to combine them!
- Cover the dough tightly and chill in the refrigerator for AT LEAST 15 minutes.
- Meanwhile, preheat oven to 350°F. Line baking sheets with parchment paper or silicone baking mats (I prefer reusable mats!). Set aside.
- Using an ice cream scoop, scoop the dough and roll into a ball. Repeat with remaining dough. Place 8–9 balls of dough onto each cookie sheet. These cookies will spread and stay chewy so space generously!
- Bake the cookies for 12–13 minutes or until the edges are very lightly brown. The centers will look very soft, but the cookies will continue to set as they cool, so pull them earlier rather than later!
- Cool on the baking sheet for 10 minutes. After 10 minutes of cooling on the baking sheets, transfer cookies to a rack to cool completely. Or grab a glass of milk and eat!
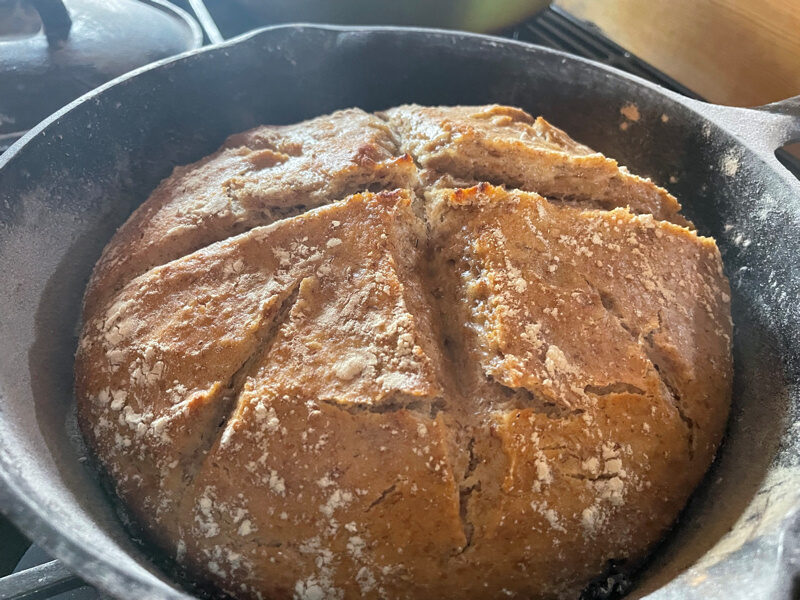
February 18, 2024 – Sourdough
Spring isn’t quite here yet, but thankfully for our tastebuds, warm fresh bread is always in season! Fragrant, crunchy and yummy right out of the oven or cooled off, a simple loaf of sourdough only takes four ingredients. Did you know, grocery store Wonder Bread contains 20–many unpronounceable!—ingredients. That’s a big difference that translates to a much simpler, healthier bread.
One of the reasons sourdough gets away with so few ingredients is that you aren’t adding any yeast—you’re actually setting a trap for wild yeast and bacteria! If you’ve never caught wild yeast before, check out the instructions below. All you need to start your microscopic safari is flour, water, and a jar.
With time, the wild yeasts and bacteria around your house—in your kitchen, on your hands, even in the flour and water itself—will begin to colonize the flour-water slurry. They’ll multiply and make bubbles that eventually help give your bread the rise it needs to become a fluffy firm loaf. In addition to helping the bread rise, these sourdough microbes help break down the flour, enhancing the nutritional quality of the bread by making it easier to digest. They also add flavor by “burping out” waste products like lactic acid and acetic acid, which make the bread taste tangy. This also rasies the pH and makes it harder for harmful pathogens and molds to form in your food!
The way you bake your sourdough and what you bake it in changes its final characteristics. You could bake it in a fireplace, in a cast-iron skillet. You could bake it in the oven on a cookie sheet. The different ways you bake it will give it a different crust, and my personal favorite way to bake sourdough is in a cast iron skillet in the fireplace. It gives it a nice, crunchy, golden brown crust when you lump the hot coals on top of a cast iron pot lid.
But I want you to figure out your favorite way to bake sourdough—play with the kinds of flour, and where you bake it, and let me know any good tips you find out!
Ingredients
- 1 cup ripe (fed) sourdough starter
- 1 1/2 cups water, lukewarm
- 2 1/2 teaspoons salt
- 5 cups Flour
But wait! What if you don’t have a starter? It’s not hard, just time consuming. All you need is:
- 1 cup water
- 1 cup flour
- Jar
- In the jar, mix the water and flour together and leave out overnight.
- Scoop out half the starter and set aside. Feed the jar again with equal amounts water and flour, and let it sit overnight.
*You can use the starter you scooped out in place of flour in any recipe, or just discard/compost.
- Repeat step two for about seven to ten days.
- Congratulations, your sourdough is now ready to use!
*You still need to feed it once in a while though, maybe once a week in warm weather or twice a month in the winter (or if kept in the fridge). Whenever you’re working on your starter, aim for 50% water, 50% flour—you can eventually make a larger jar if you want by not disposing of as much starter when feeding it. You also can just keep it manageable around two cups if you want.
*Keep in mind you also need to feed the starter the night before you bake with it to make sure all the yeast and bacteria are awake and active.
Instructions:
- Combine all of the ingredients—flour, salt, starter and water—kneading to form a smooth dough.
- Allow the dough to rise in a bowl covered with a damp cloth until it’s doubled in size, or about 90 minutes in a warm house or sunny window.
- Gently divide the dough in half; it’ll deflate some but that’s ok. Shape each piece of dough by pulling the edges into the center, turning it over so the seam is on the bottom, and rolling under your cupped hands to form a ball. Let the dough rest, covered, for 15 minutes more.
- To make fat oval loaves, elongate each ball of dough you’ve preshaped by gently rolling it back and forth on an unfloured work surface several times until it makes an oval 10″ to 11″ long.
- Put long loaves on a cookie sheet and let rise until very fluffy, about the one hour. Towards the end of the rising time, preheat the oven to 425°F.
- Spray the loaves with lukewarm water and dust generously with sifted flour.
- Make two fairly deep diagonal slashes in each like an X; a serrated knife like a steak knife works well for this.
- Bake the bread for 25 to 30 minutes, until it’s a very deep golden brown. Remove it from the oven, and cool on a rack.
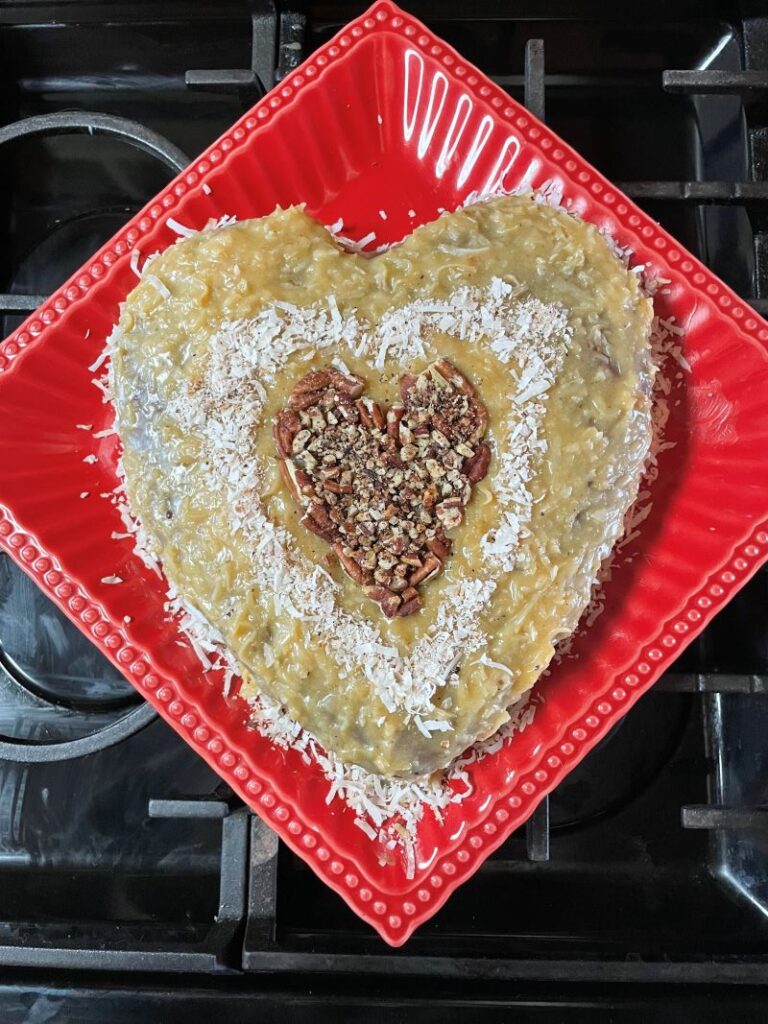
February 11, 2024 – Valentine’s Day special German Chocolate Cake
It’s almost Valentine’s Day and this cake is perfect for someone special. I’m giving it to my grandpa; he LOVES German chocolate cake! But even he was surprised to learn that “German chocolate cake” is not from Germany! Not by a long shot: it’s from Dallas, Texas.
German’s chocolate cake, as it was originally known, was created by a Mrs. George Clay and contained “Samuel German’s baking chocolate”—a popular brand at the time. Her recipe was featured in the Dallas Morning News as a “Recipe of the Day” in 1957 and the coconut in the frosting was a big deal in the 1950s! Hawaii didn’t become a state until two years later, but after World War Two, the United States went coco-nuts for all sorts of island fruits! Dried coconut could be transported more easily—it was lighter and stayed fresh longer than whole coconut, making it perfect for adding to all sorts of sweet treats.
I think it can be made even better today by substituting some of the butter for coconut oil—it’s extra coconutty! I’ve also added an extra egg to the cake itself, for more rise. Watch your cake for peak fluffiness somewhere between 25 and 30 minutes—being at a higher elevation means things bake a bit faster and tend to be a little drier than most recipes account for, so the time will vary. I find 30 perfect for tray cakes, 25 for shaped cakes like this week’s Valentine’s Heart Cake!
Ingredients
- 1 1/2 cups unsalted butter, softened (I use half butter and half coconut oil, or 3/4 cup each for an extra coconutty taste)
- 1 1/2 cups white granulated sugar
- 7 large eggs
- 1 cup semi-sweet chocolate chips, melted in a double boiler
- 2 tsp vanilla extract
- 1 1/2 cups milk
- 3 cups all-purpose flour
- 1/2 cup cocoa powder
- 2 tbsp baking powder
- 1/2 tsp salt
For German Chocolate icing:
- 3/4 cup unsalted butter (Or coconut oil!)
- 12 oz evaporated milk
- 6 egg yolks
- 1/2 cup sugar
- 1/2 cup brown sugar
- 1 tsp vanilla extract
- 3 cups coconut flakes; divided
- 1/2 cups chopped pecans roasted
- Preheat oven to 350F. Butter your pan—either a heart shaped tin, or a regular 9×13.
- In a large mixing bowl, cream together the softened butter and sugar for 3 to 4 minutes until light and fluffy. Then add in the eggs and vanilla extract. Mix again until creamy, then add the 1/3 cup milk to the batter, along with the melted chocolate. Whisk again for a minute until the mixture is smooth.
- Add the remaining milk but don’t mix it in yet (you want the liquid on top when the dry ingredients get sifted in, to make it easier to not over mix).
- In a separate bowl, combine all the dry ingredients: flour, cocoa powder, salt and baking powder. Mix together, then sift into the cake batter to get rid of any clumps.
- Using a hand whisk, mix the flour into the batter just until combined. Be careful not to over-mix the batter!
- Pour your batter into the prepared baking pans. Bake in oven for 30 minutes, or until a toothpick inserted into the center comes out clean. Allow the cakes to cool in the pan.
Frosting Time
- While the cake layers are cooling, prepare the coconut pecan filling by placing all 3 cups of the unsweetened coconut into a large saute pan. Toast on high heat for 3 to 4 minutes, until the flakes are golden. (This can also be done using a baking sheet; bake under the broiler for several minutes and toss often instead!) Reserve 1/2 cup of the flakes for garnishing the cake.
- Into a medium-sized saucepan, add the butter and melt it over medium heat. To the melted butter, add the evaporated milk, egg yolks and sugars. Whisk for a minute until smooth. Cook the custard over medium-low heat, stirring constantly with a rubber spatula, for 10 to 12 minutes, until the custard thickens and holds its shape on the back of the spatula (think Jello pudding!). Do not boil the custard; reduce heat when needed otherwise you’ll have scrambled egg frosting!
- Once the custard has thickened, remove it from the heat and add the vanilla, toasted coconut and half of the chopped pecans. Mix until well combined, then allow the filling to cool completely. Place into the refrigerator to cool faster.
- Once the cake and frosting have both cooled, frost the cake with the coconut frosting and garnish with the reserved pecans and coconut.
*It isn’t just pecans and coconut—this dark cake pairs well with all kinds of nuts and fruit! Try walnuts, pine nuts, fresh cherries, raspberries…and share with someone you love!
February 4, 2024 – Pumpkin Ravioli
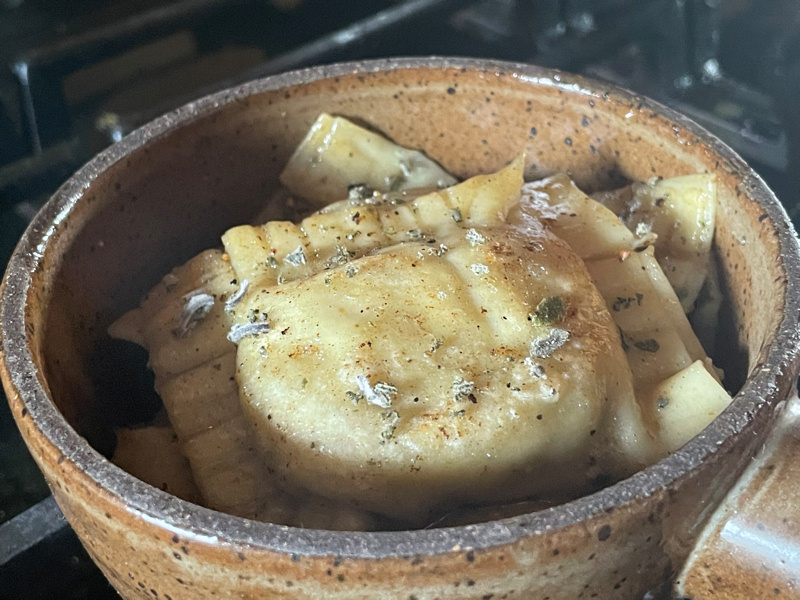
When it’s cold outside, and you need to warm yourself up, nothing beats a cozy bowl of pasta! One of the best pastas to warm yourself with this winter is pumpkin cheese ravioli.
Pumpkins, a North American native that belong in the gourd family, ripen in the fall but will keep for months depending on the variety and the way it is stored—we have a bunch in the basement right now! While people know them best as jack-o-lanterns, pumpkins can be used in a variety of ways. One of my family’s favorite ways to eat vegetables is with pasta, and I think the best pasta is ravioli! So it was easy to make the decision to try a pumpkin ravioli recipe. If you don’t have fresh pumpkins, canned pumpkin is just fine—but also isn’t “pumpkin!” Most canned pumpkin is technically made from Dickenson squash, a different type of gourd! So with that in mind, feel free to stuff your pasta sheets with whatever pumpkins (or squash) you can get your hands on.
The cheeses you use can similarly be swapped around—the recipe I started with asked for ricotta, but the store didn’t have any. We opted for mozzarella, queso fresco and Parmesan instead, but you can use any mild, melty cheese. Just don’t call it Parmesan if it isn’t from Parma or Reggio Emilia, in Italy—their cheese is so famous it has a protected designation of origin, or PDO! Using local cheeses would give it a special New Mexican flair. As is, there’s nothing wrong with these mildly pumpkiny, ooey-gooey cheesey, and definitely buttery ravioli. Watch out when rolling out the dough, though, because rolling it too thin will lead to the dough breaking open when it cooks and expands—all your filling will leak out!
Ingredients
For the Pasta Dough
- 2 1/4 cups flour
- 3 large eggs
- 1 large egg yolk
- 1/4 cup water
- Salt to taste
- Olive oil to taste
Ravioli Filling
- 1 1/2 cups roasted squash
- 1/2 cup mozzarella
- 1/2 queso fresco
- 1 1/2 tsp pepper
- Generous pinch of salt
To Serve
- 8tbs salted butter
- 1/2 tbs dried sage
- 1/4 cup parmesan
Instructions
- Make Pasta Dough: Add the flour, eggs and olive oil (if using) to a bowl and mix thoroughly. Move to your work surface and knead the dough into a ball, about 1-2 minutes. Let this rest while you make your filling.
- Make the filling by mixing the roasted squash, butter and cheeses together. Taste and season with salt and pepper as needed. Transfer to a bowl. Chill until it’s cool to touch: you can’t use hot filling to assemble ravioli because the dough will get soggy.
- Roll out your pasta dough with a pasta roller or a rolling pin until it’s just slightly see through. Trim into a long rectangle about 1 ft long and 3 inches wide.
- Grab a pasta sheet and put in filling (1 tbs at a time) along the bottom half of the sheet, spaced 2 finger widths apart. Fold the top sheet over.
- Gently push between the filling spots. Press to seal the edges and sides. Cut in between the filling spaces.
- Crimp the edges with a fork.
- Boil a pot of water; salt it generously. Put pasta in boiling water and cook until they float.
- Start the butter sage sauce in a medium frying pan ; as the raviolis cook, place 4 or 5 at a time and fry in the browned butter with sage.
- Top with Parmesan.